 Dukes
Broadest
Area Scan
Reports within your alert distance around you.
User Guide
Configure Dukes, connect your hardware, understand alerts, and use CarPlay.
Dukes App is a driving companion for iPhone and CarPlay. Pair a radar detector and the map shows live alerts with band, direction, and strength. Even without a detector, you still get community police reports, camera and ALPR locations, hazard alerts, risk context, and turn-by-turn navigation.
Pair hardware, set units, download your region.
Bottom bar, settings drawer, community reports.
Area Scan, Same Road, On Route, report lifetime.
Learning, Temporary Mute, hardware mute.
Police ahead, nearby report cards and optional live radar on CarPlay.
Live risk vs CSA heat vs learned Ka history.
Uniden, V1G2, DS1, Escort, ALP, TMG, Flic 2.
3D map, Data Mode, Risk Badge, pills, glow.
Essential setup in a few steps. Regional downloads on Wi-Fi are strongly recommended for the best map experience.
Open Dukes App. When iOS asks, allow Location and Bluetooth so the map can follow you and hardware can pair. Notifications are optional (useful for border-crossing legality alerts).
On the map, tap Settings on the bottom bar. Use Bluetooth to add hardware, or App Settings for units, alerts, CarPlay, and downloads. Search inside App Settings works the same way as search on this guide.
No detector? Dukes still works for community reports, cameras, navigation, speed limits, and overlays. Choose Standalone under App Settings → Driving & Standby → Standby and skip pairing a radar detector.
Enough to drive today. Add recommended downloads afterward on Wi-Fi.
A radar detector is optional. If you have one, tap App Settings → Devices & Connections → Add Device → Radar Detector. Choose Uniden or Radenso (R4, R4w, R8, R8w, R9, R9w, DS1), Escort, or Valentine One Gen2. Power the detector on and stay close for the first pair.
Uniden R7 is not supported — it does not provide Bluetooth connectivity Dukes can use.
Driving without a detector still covers community reports, cameras, navigation, speed limits, and overlays.
For AL Priority or TMG, use Bluetooth → Add Device and pick the matching laser-defense category. ALP pairing needs the PIN shown on the ALP pad. TMG pairing uses the code shown in the device footer.
ALP Parking / Detection / Defense is controlled from the ALP pad (and from the CarPlay JTK button when connected). Skip this step if you do not have a jammer.
App Settings → Driving & Standby → Units: pick KM/H or MPH. Distance stays paired (kilometers or miles).
App Settings → Banners & Visuals for radar banners. Sound & Voice for spoken announcements and audio routing (including Media Audio); open Sound & Voice → App tones for Dukes-generated tones. Alert Sources for cameras, hazards, aircraft, and community police feeds.
Community police alerts need feeds under the Custom Feeds drawer tab, then filter behavior under Alert Sources → Custom Feed Alerts.
Leave Keep screen on enabled under Driving & Standby, mount the phone where you can glance safely, and drive. The app reconnects to remembered devices and can learn GPS lockouts after you turn that system on.
You can drive without regional packs. Some road-matching features are much stronger with them installed.
Enhanced Speed Limits for your state or province. Same Road — Strict defaults to Speed Pack matching. Its Strict Road Matching selector can instead use a regional Road Graph, downloaded as Threat Horizon Road Map. On Route and Highway Early Warning keep their own prerequisites; the selector does not change their authority. See Strict Road Matching setup.
CSA Enforcement Overlays (historical heat on the map) and CSA risk score data (refines live Risk Score). Both live under Data & Downloads. They are separate files.
Camera database extras (Enhanced US/CA or ExCam), aircraft identification download, and laser voice packs if you use ALP or TMG.
The app is built around a single live map. These are the controls and drawer tabs you use every day.
NAV — Opens navigation search when you are not navigating. While navigating, tap the blue Nav control for the route card (end, pause, overview, voice).
Recenter — Centers the map on you and re-enables follow.
Settings — Opens the bottom settings drawer.
Custom or V1 Custom — Quick-toggle for a saved Uniden or V1 custom detector profile when one is configured.
ALP [profile] — Shows AL Priority status when connected. Mode changes still come from the ALP pad or CarPlay JTK.
Report (bottom-right) — Tap for the full report sheet. Long-press about 1.5 seconds submits a quick Police Visible report at your location. Police Other Side in that sheet files a visible police report for the other direction of travel. It does not mark the report as hidden or mobile, and it does not describe which way an officer is facing.
North up keeps the map with north at the top instead of rotating with your direction of travel. It is under App Settings → Map & Appearance and applies to the phone map and CarPlay cameras. Off means the map stays heading-up.
Heading up while navigating is available only while North up is on. During navigation it rotates with your heading, then north-up returns when navigation ends. Turning North up off also turns that option off.
While North up is the view on screen, the map is 2D. Upcoming Street Labels then use 2D Label Size. The iPhone heading-up follow view, and CarPlay while 3D is actually showing, use 3D Label Size. On CarPlay, North up during navigation selects classic 2D framing even if the saved 3D preference stays on. Labels still require the map to be following your vehicle. North up does not change alerts or the route.
Map style is how the base map looks: Auto, Standard, Satellite, or Hybrid. The phone control is under Map & Appearance. CarPlay has its own map style under CarPlay. On CarPlay, Auto can switch between Standard and Hybrid with speed, and Satellite stays manual. Power Saver forces Standard. Map style does not choose a route.
Traffic flow is Apple traffic coloring on roads. It is off by default. It is not Traffic rerouting, which is a separate Navigation control that can suggest or change a route.
Theme is Light, Dark, or Automatic under Appearance. Automatic can follow a clock schedule or sunset. Theme does not change map style or the route. CarPlay overlay appearance can follow the app, or be forced light or dark, for Dukes banners and badges. That overlay choice is not map style.
The location marker is the symbol for your vehicle on the map. Choose Arrow or Dot under Map & Appearance. Arrow styles include Classic and Vehicle colors such as Silver, Black, Blue, and White. Phone size and CarPlay size are separate, and CarPlay can be as small as 30 percent. Fill and outline colors are customizable.
The marker does not change alerts, voice, lockouts, follow mode, or the route. It is not the CarPlay vehicle-position offset used with Threat Horizon.
Speed and distance units are under App Settings → Driving & Standby → Units. They stay paired. Kilometers goes with KM/H, and Miles goes with MPH. Changing either control updates the other. Speed limits, Quiet Ride, distances, and similar readouts follow that pair.
CarPlay navigation distance can still disagree with the app. CarPlay Distance Units can follow Dukes or follow iPhone Maps. If the car shows kilometres while Dukes shows miles, check that CarPlay choice. It does not change the phone’s paired units by itself.
Hide detector-specific controls is under Driving & Standby and is off by default. It hides radar and detector controls in Alerts & Audio and related screens, and it can hide detector drawer tabs. Road alerts, the map, voice, and navigation stay available.
It does not disconnect a detector, delete settings, or stop those road alerts. If radar banners are missing while a detector is connected, check that this switch is off and that Standby is not waiting on the detector.
Some tabs hide when Hide detector-specific controls is on, or when your detector does not use K Blocks.
App Settings — Devices & Connections, Driving & Standby, Battery & Performance, Sound & Voice, Banners & Visuals, Muting & GPS Lockouts, Alert Sources, Map & Appearance, Navigation, CarPlay, Data & Downloads, Diagnostics, and Backup, Help & About. Use Find a setting for a specific control or Ask Dukes for an explanation. On iPhone, Ask Dukes appears at the top of App Settings.
Ready to Drive — The featured card at the top of App Settings. It is a status page, not a settings editor. It shows Driving Mode, Units, CarPlay, Sound & Voice, Banners & Visuals, Navigation, Alert Sources, Speed Limits, Regional downloads, Custom Feeds, and Backup, and jumps you into those screens.
Bluetooth — My Devices: detectors, ALP, TMG, Flic 2. Add Device, reconnect, forget.
Default Settings — Uniden Default / Custom profiles, or V1 Settings when a Valentine One Gen2 is connected.
Location Automations — Named areas that apply settings when you enter or leave. Older versions called these Geofences.
K Blocks — Per-frequency K-band filters for Uniden models (not DS1 or V1).
Muting — GPS lockouts, Temporary Mute, Dynamic Muting, lockout map, import/export.
Encounters — Alert session history: Feed, Map, Insights.
Custom Feeds — Add community police/data feeds, bundles, and quick setup.
Phone: tap Report for police, traffic, crash, hazard, weather, road closed, and more. Long-press for instant Police Visible.
CarPlay: the report button opens a category grid, not an instant police ping. You can reorder those buttons under App Settings → CarPlay → CarPlay Report Order.
Voting (Still There / Not There) is available when you are close to a police report, including thumbs confirmation near the CarPlay speed overlay when that option is on.
Name the side streets ahead while the map follows your vehicle in 2D or 3D. Labels work on iPhone and CarPlay, with or without active navigation. The feature is off by default.
Turn it on: open App Settings → Map & Appearance → Upcoming Street Labels, or App Settings → CarPlay → Upcoming Street Labels in the Map section. These controls share one setting. When enabled, Street Label Style offers Capsule (default) or Capsule + Nib, which adds a small pointer at the junction. 2D Label Size and 3D Label Size each offer Compact, Standard (default) or Large; each map uses the size for the mode it is actually showing. Label size also adjusts automatically with map zoom, getting a little smaller as the map zooms out, and larger text sizes in iOS keep labels readable even with Compact. Style and sizes are shared by iPhone and CarPlay.
Install your region: use App Settings → Data & Downloads → Threat Horizon Road Map. Labels need usable Road Map coverage at your current location and a road match. A map installed for another region is not enough. Speed Packs, CSA overlays, CSA risk data and camera databases are separate downloads. The Threat Horizon HUD does not need to be enabled.
Keep the map following your vehicle: tap Recenter after browsing away. On iPhone, the heading-up 3D follow map uses 3D Label Size and North up uses 2D Label Size; an obscured map does not show labels. On CarPlay, the classic camera uses 2D Label Size and the active 3D Navigation Map uses 3D Label Size. North up during navigation or Highway 2D switch CarPlay to 2D even while the saved 3D preference remains on, and the label size follows the mode that is actually showing.
Enabled but no labels? Check that the active map is following your vehicle, location availability, and Road Map coverage first. Even with coverage, a usable road match and eligible side street ahead are needed. Labels are limited to up to three without navigation or two during navigation; an empty stretch of road is not necessarily a setup problem.
Open the map drawer and use Find a setting to jump to a control. For example, search for Band Colors, Reduced Memory Speed Packs, or Secondary Police HUD Only. A result can explain which feature or HUD style is required. Opening a settings result keeps the saved choice until you edit it.
Ready to Drive shows whether the speed limit is shown or hidden. If speed limits are shown and there is no regional speed pack, open Get regional speed data. Data & Downloads lists installed packs and updates by family. Voice can be off by choice.
Police warning settings are in App Settings → Alert Sources → Police reports. This screen was called Custom Feed Alerts. Use Add a feed or Manage custom feeds there to open the separate provider manager.
Open App Settings → Ready to Drive → Set Up Dukes, find it in settings search, or ask Ask Dukes to set up a first drive. Resume an unfinished walkthrough from the same card. Choosing a setup path without a detector skips the detector lockout step.
Review equipment, units, audio, quieting, standby, and performance. Test Voice or Test Tones while parked. The display step includes the shared radar banner choice and the Signature HUD preview. The final review shows your actual selections and links to police reports and regional downloads. Completing the walkthrough records setup progress.
Open App Settings → Banners & Visuals → Band Colors, or search for Band Colors. Choose the color for each radar band. Each row shows Default, a recognized color name, or an RGB hex value. Translucent custom colors also show their opacity. At accessibility text sizes, the radar banner style picker appears before the preview. Its list shows all five styles and a checkmark beside the current choice. Select a style to return, or use Back to keep your choice. In Arrow Colors, choose Front, Rear, or Side under a band to open the system color picker. You can set a different color and opacity for each direction. Turn off Hide detector-specific controls under Devices & Connections if these editors are hidden.
Signature uses the selected band color on its band name. Frequency, direction, and lockout text keep the HUD text color. Strength bars show signal strength independently of the selected band color.
Open App Settings → CarPlay → Risk Badge & Threat Horizon → Preview Signature HUD. While parked, try the police, multiple-signal, GPS lockout, and full-navigation examples at different widths. The preview works even if the HUD is off. Threat Horizon Style and Threat Horizon Attention each open a selection list. Choosing a style keeps the separate cruising-radar and secondary-police preferences as you set them.
Open Ask Dukes at the top of App Settings to ask about settings, alerts, CarPlay, detectors and other Dukes features. Use it while safely parked.
Help without Apple Intelligence: bundled help, search and Browse all help work on supported iPhones without a ready model or an internet connection. Settings changes and setup also work locally. Optional Apple Intelligence assistance is off by default. If the phone is hot, help uses the bundled guide without model assistance.
Finding the right answer: name the button or setting and choose iPhone or CarPlay. Common questions provide starting points. Expand Full answer details to read the complete explanation, or search Browse all help.
Current state: Ask Dukes reads only relevant approved app settings and requirements. It cannot see your screen or reconstruct a past alert. Unknown state is not the same as off.
You approve changes: suggested setting changes require your action. Multiple changes can open Review Changes. Choose a next step to open a setting or review the current and proposed values. Ask about a first drive to open Set Up Dukes. Ask Dukes does not configure custom feeds, explain alert sourcing, inspect private contents or control detector hardware.
Privacy and updates: questions are not saved or sent to a Dukes AI server. Other app features may use online services. The app includes reviewed help with each build; it does not search the web for answers. If the bundled guide cannot load, use Settings Search and include your app version and build in a support report.
Under Sound & Voice → App tones, choose the band or alert and import its file. After a successful import, Test plays the selected sound. If a replacement cannot be read, choose another file. The previous sound stays available. Laser voice packs use a ZIP containing MP3 clips.
First launch offers a guided demo. Replay Onboarding and the Power Features Tour are under App Settings → Backup, Help & About → About. Replay them any time. They walk through the map and the main controls, and they do not change your saved settings by themselves.
When a signal is detected, a colored banner appears. Colors and labels tell you the type of threat.
Police radar guns operate on different radio frequencies. Each band has its own color.
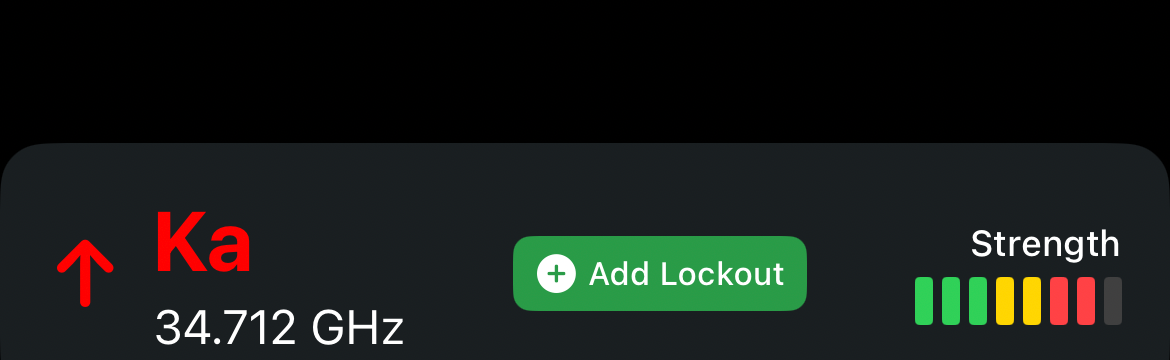
The most common frequency used by modern police radar. Treat every Ka alert seriously. More bars usually means closer.
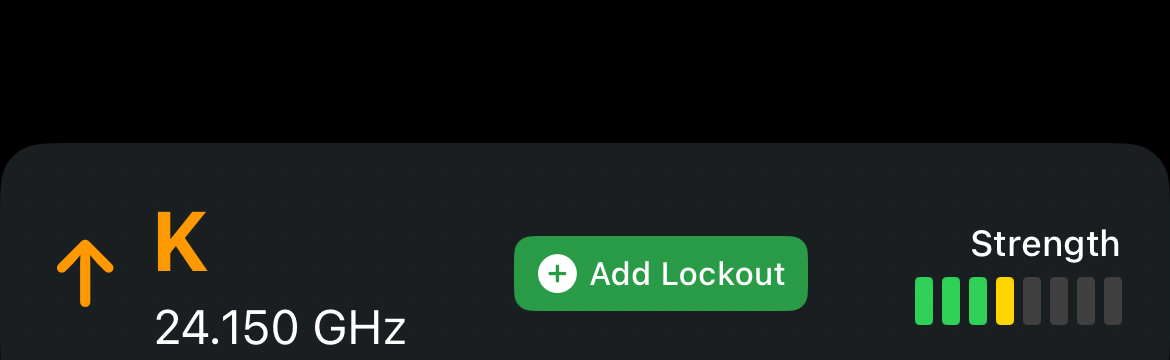
Used by police and also by blind-spot monitors, automatic doors, and speed signs. Context matters — K on the highway is worth attention.
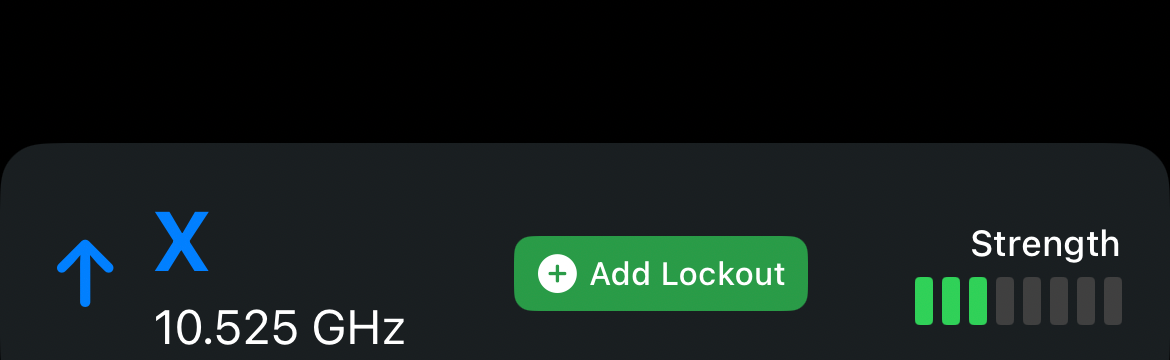
Older frequency. Most X signals come from automatic doors and motion sensors. Rarely used by police in North America, still active in some areas.
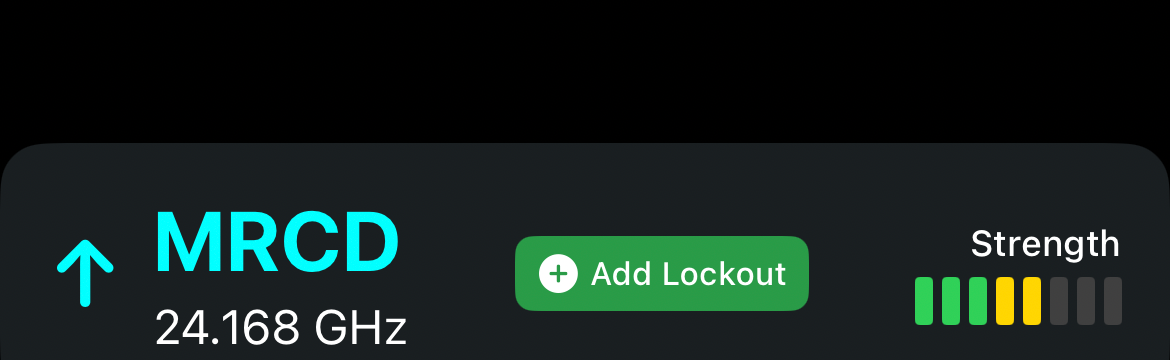
Photo radar used in some regions. Your detector needs MRCD support enabled to catch it.
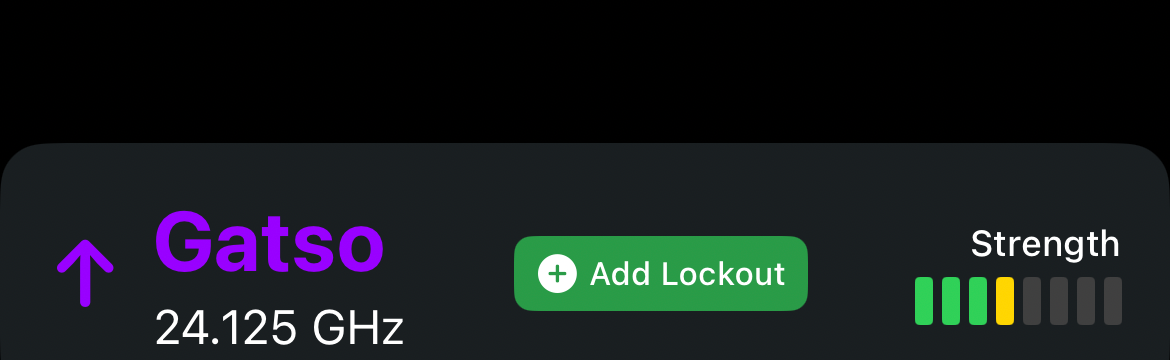
Automated photo-radar speed camera. Detected by compatible radar detectors.
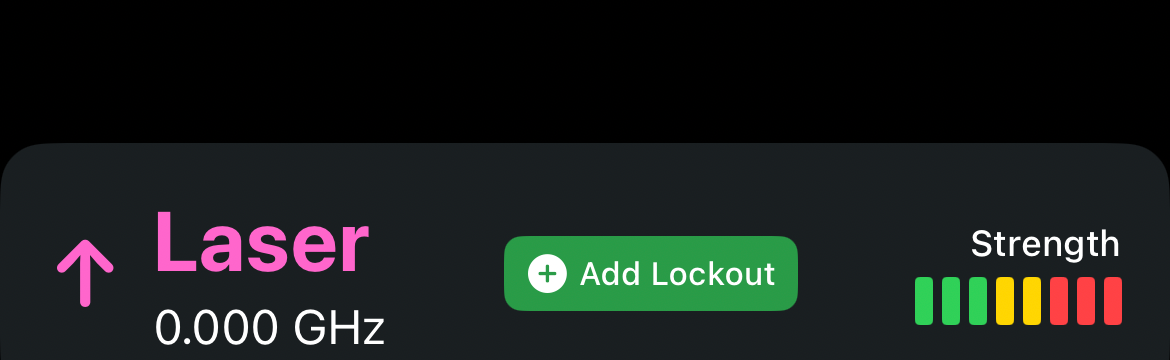
Police laser (LIDAR). Extremely precise. By the time a detector hears it, the officer is often already measuring. A laser jammer is the usual proactive defense when that hardware is legal and connected — a detector alone cannot stop a laser shot.
Banner layout is set under App Settings → Banners & Visuals.
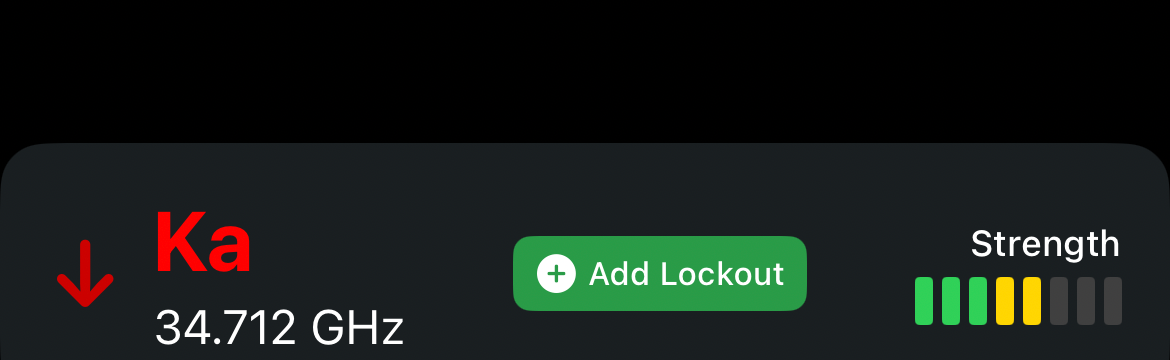
The arrow points backward. Direction arrows are available on multi-horn detectors (Uniden R8/R9 family and V1G2). R4 and DS1 are omnidirectional.
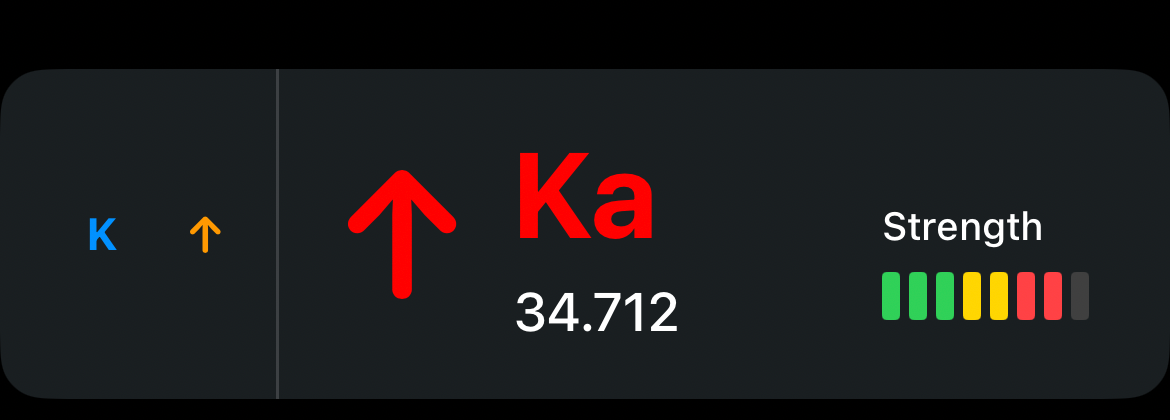
Multiple signals combine into one banner. The strongest or highest-priority signal is shown first.
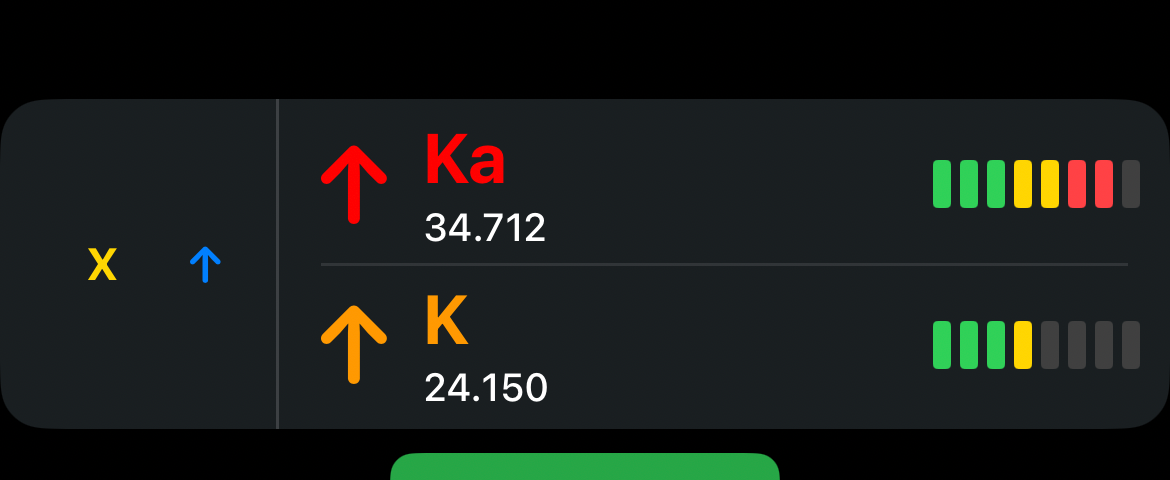
Expert Consolidated shows frequency and strength detail. Radar Direction View adds a map cone for bearing, optional HUD placement during navigation, and optional Adaptive RDV Learning (off by default).
Open App Settings → Banners & Visuals and choose Consolidated, Expert Consolidated, or Radar Direction View to show Radar Priority. Priority chooses which signal leads; it does not enable or disable bands on your detector.
Standard: Laser → Ka → MRCD → K → X → GATSO. Gatso Early: Laser → Ka → MRCD → GATSO → K → X. Signal Strength: the strongest signal becomes primary.
Custom: select Custom, then open Custom Order. Drag the six supported groups — Laser, Ka, MRCD, K, X and GATSO — into your preferred order, highest priority at the top. Every group stays in the list; you do not need to remove a band to lower its priority. The order is saved across app launches.
For example, to prioritize Laser, K, then Ka, move those three to the top in that order and leave MRCD, X and GATSO below them. Reset to Default restores the Standard band order while keeping Custom selected. To use a preset again, choose it in Radar Priority.
The selected priority also guides Dukes-generated radar-tone selection when multiple signals compete. It does not change the detector's own speaker settings or the separate spoken-alert Priority Order under Sound & Voice.
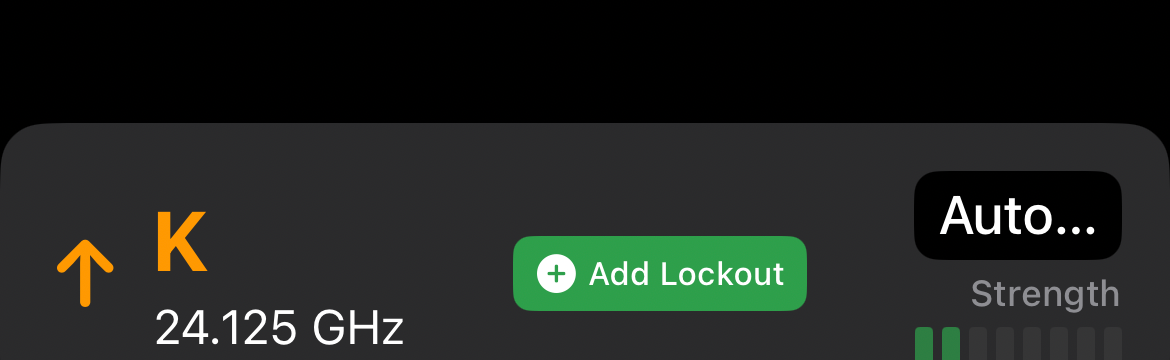
Greyed-out when Grey out muted alerts is on. The signal is still tracked. Audio may be silenced by manual mute, Temporary Mute, GPS lockout, low-speed mute, or Dynamic Muting.
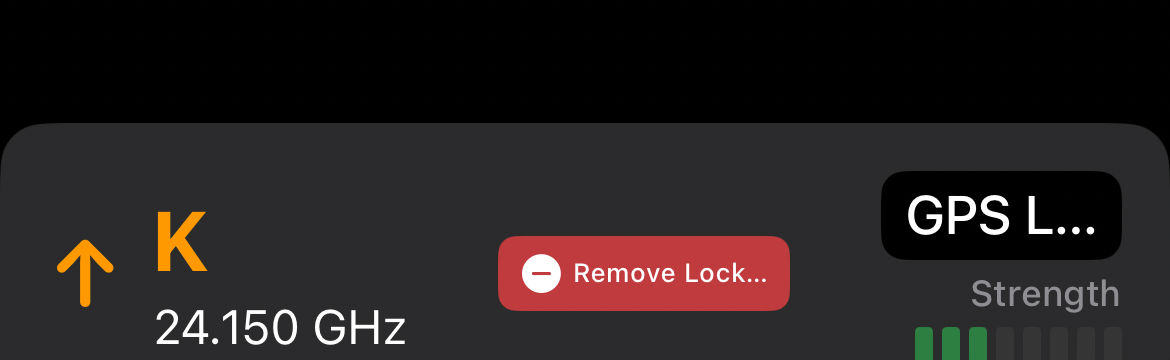
This location is locked out for that frequency. Lock and unlock icons let you manage it on the fly when Manual GPS Lockouts is on.
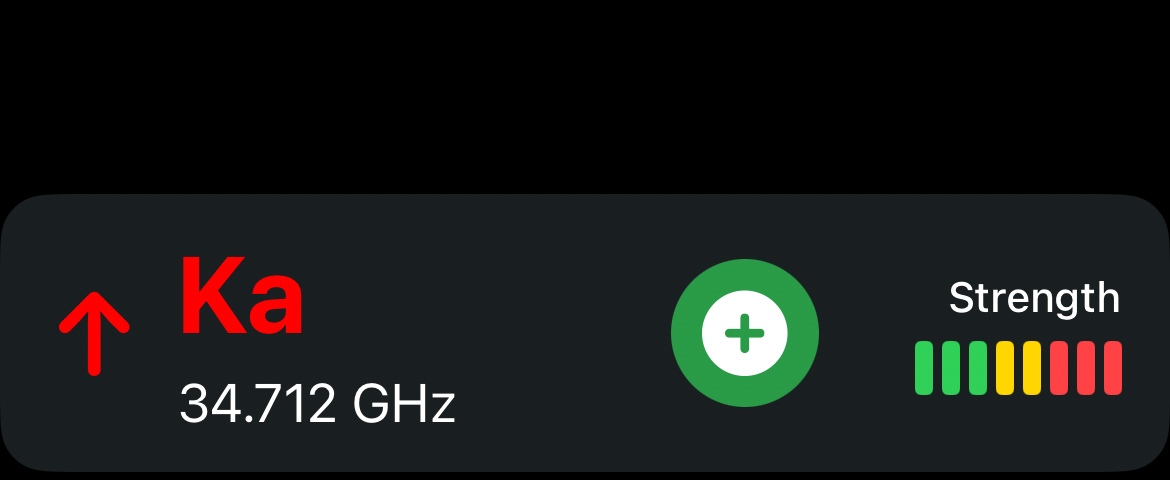
Classic — Large shows bigger banners (up to 2 at once instead of 4).

When Tiny muted banners is on, muted signals shrink to compact pills. Temporary Mute keeps the normal banner visible on purpose.
Community police reports come from feeds you add under Custom Feeds. How those reports appear is controlled under Police reports. Alerts depend on feed availability and how recent each report is — Dukes cannot invent coverage where a feed is down or a report is stale.
Settings›Alert Sources›Custom Feed Alerts
Under App Settings → Alert Sources → Police reports, choose Same Road — Strict, then select Speed Pack (default) or Road Graph.
The selector applies to Police Same Road — Strict and its applicable Smart Same Road case. It does not switch Highway Early Warning, Threat Horizon, or On Route's no-navigation fallback to this source. Those modes retain their own road/route selection.
These are road-matching downloads. They are separate from camera databases, CSA heat overlays and CSA risk score data.
These modes control the primary banner or voice alert. Threat Horizon selects its forward headline independently. Nearby cards in the HUD use the separate pill filter.
Broadest
Reports within your alert distance around you.
Direction aware
Reports in your direction of travel.
Recommended
Prefers your road, with nearby parallel or similarly named roads when map data is incomplete.
Geometry required
Needs a clear match from the selected Strict Road Matching source: Speed Pack or Road Graph, with matching regional coverage.
Highway
Strict matching with longer range for highway speeds.
Navigation-aware
Uses your active navigation route. Falls back to Same Road — Strict when you are not navigating.
| Mode | What you see |
|---|---|
| Area Scan | Reports within your alert distance around you. If nothing is clearly ahead on-road, the closest in-range report can still appear. |
| Ahead Only | Reports in your direction of travel. |
| Same Road — Balanced | Default. Prefers your road or corridor, but can include nearby parallel, frontage, or similarly named roads when map data is incomplete. |
| Same Road — Strict | Needs a clear match from the selected Strict Road Matching source: Speed Pack or Road Graph, with matching regional coverage. Stays quiet rather than guessing. |
| Highway Early Warning | Strict matching with longer range for highway speeds. |
| On Route | Uses your active navigation route. A report farther down the highway can be ignored if your route exits before reaching it. Reports behind you or on parallel roads stay hidden. When you are not navigating, this falls back to Same Road — Strict — never to Balanced. |
Smart Area Scan and Smart Same Road live under Advanced filtering. They switch behavior with speed instead of staying on one mode.
Community police reports can be labeled more specifically when the report includes that detail. Dukes does not decide the label from the road name.
Police is the normal report. Hidden Police means the report was received as a concealed or hidden police report. Mobile Police means the report was received as police with a mobile camera. A report without that detail stays a normal Police report.
On a large banner, the title reads POLICE, HIDDEN POLICE, or MOBILE POLICE. The spoken alert says “Police”, “Hidden police”, or “Police with mobile camera”, followed by the road when a road name is available. Compact pills stay short and do not grow to fit the longer names.
The map pin stays the police shield. Hidden Police adds a small crossed-out eye at the upper corner. Mobile Police adds a small camera mark at the upper corner. Both are still police reports, not camera-database alerts. The center star still changes color with how fresh the report is. The shield itself can still turn red when that report is the one offered for a vote. Those two colors mean different things, and the corner mark does not replace either of them.
The road text, including a name such as HWY 99 N, identifies the road associated with the report. It is not a statement of which way an officer is facing or which way enforcement is aimed.
Police Other Side, in the report sheet on iPhone and the report grid on CarPlay, files a visible police report for the other direction of travel. It uses the normal police pin. It is not a Hidden Police or Mobile Police report.
Alert Sources → Community Hazards → Report Lifetime (also used for police). Each category can use:
Standard — Up to about one hour from the original report time.
30 Minutes — Shorter cap from the original report time.
Live Presence — Stays while the report is still being observed, with a one-hour fallback if presence updates stop.
A later confirmation (thumbs-up / Still There) does not restart the Standard or 30 Minutes clock. Confirmation count and latest confirmation age can still show on pills and map pins.
Construction and road closures keep long-lived behavior and are not on this list.
The star on a police shield shows how fresh the report is. The color style is chosen with the police report freshness setting. Show report age on police pills can also print a phrase such as “20 min ago.” Max report age limits tone and voice only. An older report can still appear on the map.
When you are close enough for Dukes to offer a vote, the shield can turn red. That red shield is the vote state. It is not the star’s age color. Still There and Not There are the votes. Not There removes the alert. Still There can shrink it to a pill. The corner mark on Hidden Police or Mobile Police does not change the star or the red vote shield.
Pill banners keep extra or dismissed alerts as compact chips. They have their own filter mode and distance.
CarPlay Police Proximity Glow draws a halo behind police map icons as you get closer (soft / strong / pulse distances). Separate from Flash Nearby Police Pill, which pulses the pill border.
Background alerts and duplicate merging are configured under CarPlay background notifications. Newest matching report wins.
Camera, hazard, aircraft, and community police settings are under App Settings → Alert Sources (older releases used a Safety Alerts menu name).
Speed cameras, red light cameras, license plate readers, and suspected LPR locations. Combined locations can appear as a split banner.

Fixed camera that photographs vehicles over the limit. Default alert distance 400 m.

Intersection camera for red-light violations.

Photographs plates. Not a speed camera. Separate LPR distance and suspected-LPR options.

Nearby cameras of different types shown together.
Database source: Dukes, Enhanced US/CA, or ExCam. Do not rely on a published camera count — it changes as databases update.
Voice modes include All Alerts, Timed Cooldown, Same Road Only, and Smart Same Road. CarPlay camera icons and approach banners are off by default and live in Banner & CarPlay.
Deleted cameras can be restored from Camera Alerts when any have been hidden.
Community hazards are reports from other drivers, such as a stopped car, a crash, construction, a closure, weather, an object, an emergency vehicle, a broken traffic light, or a general hazard. The master control is off by default under Alert Sources. Map icons, banners, and voice are separate: an icon can be on while the banner or the voice alert is off. Filter banners with Area Scan or Same Road. CarPlay can show a compact hazard pill when banners are enabled. These are not police alerts and not camera alerts.

A vehicle stopped on or beside the road.

A crash reported ahead.

Active roadwork ahead.

Emergency vehicle reported on the road.
A speed corridor is an average-speed zone. It is not the live speed-limit sign beside the vehicle, and it is not Predictive mode. The corridor master alert is off by default. Approach distance, voice, the map, and CarPlay icons are separate controls.
Custom locations are places you add yourself: a speed camera, red-light camera, plate-reader site, speed trap, or waypoint. A personal reminder uses a neutral pin, not an enforcement-camera pin. Custom-location alerts are separate from corridor alerts and from downloaded camera databases. This help does not set up a data source.
Add your own speed cameras, red-light cameras, ALPR sites, speed traps, and waypoints. Drop a pin, enter coordinates, or import/export a list. Personal reminders have a neutral pin glyph distinct from enforcement cameras. See Map Icons for pin styles. These reminders are not live speed-limit matching and not an average-speed corridor.
On by default under Alert Sources. Dukes can notify you when you cross into a state or province where radar-detector legality may differ. The notice is a reminder, not a legal ruling, and it does not change your detector settings or silence alerts. This guide does not describe a separate CarPlay control for the notice.
Learn recurring false alerts, temporarily silence a signal, or control detector hardware muting.
Drawer›Muting
Turn on Enable GPS Lockouts to apply your saved choices. While the master switch is off, automatic learning and manual lockouts are inactive. Turning it back on restores the choices shown. Turn on Auto-learn lockouts if you want Dukes to learn recurring signals.
A pass is counted when you enter the mute radius, the signal matches band and frequency, and — for later passes — you have left the radius and come back. Sitting still at the same door sensor does not earn another pass.
Default is 3 passes to activate. The first detection at a new site counts as pass 1 after a brief dwell. Visit interval defaults to 4 hours (0 means every qualifying re-entry can count).
Learning lockouts are saved but not yet muting. Active lockouts mute matching alerts. Manual lockouts skip learning and become active immediately.
Matching uses the same band, a location inside the mute radius (default 400 m), and frequency within K-band drift (default ±10 MHz). Highway Guard tightens that window at high speed or when Ka is active.
Lockout Retention: Automatic (default) can remove auto-learned lockouts after repeated verified misses. Keep Forever never auto-removes promoted lockouts; you can still delete them yourself.
Overlapping promoted lockouts of the same band are handled carefully so one site is not deleted because of the other.
Use Map of saved lockouts, the searchable list with merge, and import/export (JSON and CSV) in the lockout toolkit.
Highway Guard makes GPS lockout matching stricter above its activation speed (default 90 km/h) or while Ka is alerting. The goal is to make a real radar signal near a known false alarm less likely to be silenced. It is on by default once you open GPS lockout tuning. It does not detect enforcement by itself, and it does not promise that every real signal will alert. It only changes how tightly a saved lockout is allowed to match. It applies to Dukes lockout decisions on the phone and while CarPlay is connected. It is not Temporary Mute and not a detector hardware mute.
Low-speed mute — Optionally silence X/K (and separately MRCD/Gatso) below a speed. Off by default.
Dynamic Muting — Three separate app-side controls, all off by default. They silence Dukes audio. They are not GPS lockouts, not Temporary Mute, and they do not change a detector menu by themselves.
App Tone Blocks — Up to eight app-side K-band audio suppression windows for Uniden R4/R4w/R8/R8w/R9/R9w and ALP radar, using frequency, strength and direction conditions. DS1, Valentine and Escort are not supported. No hardware commands are sent. Different from detector K Blocks.
Ka Mute Override — On by default. If you have manually muted and a new Ka appears, the detector is unmuted. Separate from GPS lockout Ka protection, which will not apply K-band lockout mute while Ka is active.
Synchronized lockouts — Off by default. When on, promoted X/K/Ka lockouts can also write to detector mute memory on supported Uniden hardware. MRCD/Gatso stay app-side.
Faster hardware mute for GPS lockouts is a V1-only option, off by default, and does not run while Ka is active.
Timed per-signal mute without creating a GPS lockout. Long-press a phone radar banner and pick a duration.
Durations: 5, 15 (default), 30, or 60 minutes.
Supported: Eligible Uniden, Radenso, Valentine, Escort and ALP radar alerts. Laser, MRCD, Gatso, other photo-radar groups and unknown bands cannot be temp-muted. Availability of detector hardware muting depends on the connected model and settings.
Allow Temporary Mute for Ka is off by default. Use carefully — it can silence Dukes audio for a strong Ka.
Also Mute Connected Detector is off by default. Without it, only Dukes tones and voice are silenced; the detector speaker can still sound. Hardware support varies.
Remove a mute from the Muting list or from the banner action. Temporary Mute keeps the alert visible. A normal tap mute is one-time and has no timer. It is not a GPS lockout, not a detector hardware mute, and not a permanent audio setting. When the timer ends, Dukes audio for that signal can return.
Phone, CarPlay muted-banner, and Data Mode can all show Temporary Mute status. CarPlay muted-banner Temporary Mute is on by default.
These three controls live under the Muting drawer, in Dynamic Muting. Each is off by default. Each silences Dukes audio. None of them is a GPS lockout, Temporary Mute, or a change to a detector menu. A detector can have its own Quiet Ride; that hardware control is separate from Dukes Quiet Ride.
Signal-strength muting keeps a weak signal quiet until it reaches the strength you set for that band. It does not care about your speed or the posted limit.
Quiet Ride mutes at low speed unless the signal is strong enough to break through. You set the speed in your current units. If the speed reading is wrong, Quiet Ride can mute at the wrong time. It is not “mute below the speed limit.”
PSL muting mutes the bands you select while you are below the posted speed limit plus a buffer. Zero buffer means only below the posted limit. A strong signal can still break through. It needs a usable posted limit for the road. If that limit is wrong, PSL follows the wrong number. It is not Predictive mode and not the sign you can see out the window unless those happen to match.
The same Dukes audio mute applies on the phone and while CarPlay is connected. CarPlay can label a muted radar banner as Quiet Ride or a similar reason. The detector speaker is unchanged unless a separate hardware mute is on.
Four related systems. They are not the same feature.
| System | What you see |
|---|---|
| CSA overlay | Historical enforcement heat on the map. Download regional overlays. Optional heat along the navigation route. |
| Live Risk Score | A percentage and level for where you are now, influenced by live police, radar/Ka, laser, and local patterns. Show threat intelligence is on by default. |
| Historical learning | Downloaded CSA risk packages plus on-device Ka encounter hotspots (CarPlay Historical Ka Learning). |
| Threat Horizon | CarPlay HUD with the current Risk gauge and forward reports. Off by default. |
Neutral can also appear when there is nothing meaningful to score. These levels belong to live Risk Score. Threat Horizon uses a different forward scale: Low, Elevated, High, Immediate.
Phone display: Banner (Bottom) or Box (Map Widget) (default). Content modes: Risk Only (default), Risk + Confidence, Level Only, Classic.
Sensitivity: Chill (highway), Normal / Balanced, Aggressive (city).
CarPlay Show risk badge is off by default. Enhanced Risk Badge (on when the badge is shown) adds risk level plus day/time context. Optional nearby police count and distance (default radius 12 km). The badge is display-only.
Live Risk Score is a percentage and a level for where you are now. It can reflect live police, radar or Ka, laser, and local patterns. Levels are Neutral, Low, Moderate, High, and Critical. Neutral means there is nothing meaningful to score. It does not mean you are about to be stopped, and it is not a count of tickets.
It is not the CSA enforcement heatmap, and it is not Threat Horizon. The heatmap is historical enforcement tint on the map. Threat Horizon is a CarPlay forward display with a different scale: Low, Elevated, High, and Immediate.
On iPhone it is Show threat intelligence under Map & Appearance, on by default. Show it as a bottom banner or the map box. Sensitivity is Chill, Normal, or Aggressive. On CarPlay, Show risk badge is off by default and is display-only. While Threat Horizon is showing, it replaces that badge.
The CSA Enforcement Overlay draws historical enforcement heat on the map. The tint comes from CSA overlay downloads for a region, managed under Data & Downloads or Map & Appearance. Optional heat along a navigation route is a separate choice and is off by default.
It is not Live Risk Score, which is a level for where you are now. It is not Threat Horizon, which looks ahead on CarPlay. The overlay does not create police alerts and it does not change radar detection.
The overlay toggle is on by default. Intensity, and a filter of Show All, Medium and High, or High Only, change how strong the tint looks. You can exclude places where you do not want the tint. Phone and CarPlay can both show the heat when it is enabled. A missing regional download is a common reason the map has no tint.
See the next relevant police report or enforcement hotspot on the full-screen CarPlay map. With Signature HUD, you can also see nearby police cards and live detector signals in the same strip.
App Settings›CarPlay›Risk Badge & Threat Horizon
Updated November 4, 2026. This chapter covers the Threat Horizon controls in Dukes 2.6.1. Earlier builds may show fewer options.
Police ahead. A headline such as Police · 600 m · Ahead · Same Direction belongs to a specific forward report. While cruising, Dukes checks the road and direction of travel. During navigation it can follow your route, so a report beyond the exit you’ll take may drop out. Same-Street Threats can include reports ahead on a matching street when road geometry is difficult to resolve. It starts off.
Nearby police cards. Turn on Show Secondary Police in Threat Horizon to use the strip for nearby reports when there is no active forward threat. Each card can show a bearing arrow, distance, street, report age and confirmations when available. A card pointing behind you is still useful nearby context. The shelf uses the existing eligible secondary reports and the space on your display.
When a forward threat takes over. The headline replaces the cards. With Secondary Police HUD Only off, eligible secondary police can use their usual pills beside an active HUD. Turn HUD Only on if you prefer those police pills suppressed while the active headline is showing. The cards can return after the threat clears. HUD Only setting. If the HUD itself is unavailable, normal pill rules apply.
If you want a count instead. Under Risk Badge, enable Show risk badge and Show nearby police. Choose Count + Distance or Police Count Only and set the radius. This controls the floating badge’s summary. Individual cards use the secondary-police settings above.
For missing cards, check App Settings → Alert Sources → Police reports. Enable pill banners, Pill filter mode and Pill distance determine which secondary reports are available. The forward headline makes its own road or route selection. Police & Community guide
Show Radar in Signature While Cruising appears when Signature HUD is selected. With it off, radar uses your chosen banner. With it on, the visible Signature strip can use spare space for radar while navigation is off.
Radar Banner Exceptions. After enabling cruising radar, open Radar Banner Exceptions. Turn on Ka to keep Ka in your selected banner, such as RDV, and leave K off to allow K in the HUD. Both can appear at the same time. Every exception starts off, so existing setups keep their current display. The choices remain saved if you turn cruising radar off.
K and Ka exceptions include their corresponding POP signals; unclassified POP follows Ka. The separate POP switch keeps all POP signals in the banner. Other supported radar types have their own switches. Laser keeps its normal banner. During navigation, with a hidden HUD, or without sufficient room, all signals use normal banners. These options do not change detection, sound, muting, or GPS lockouts.
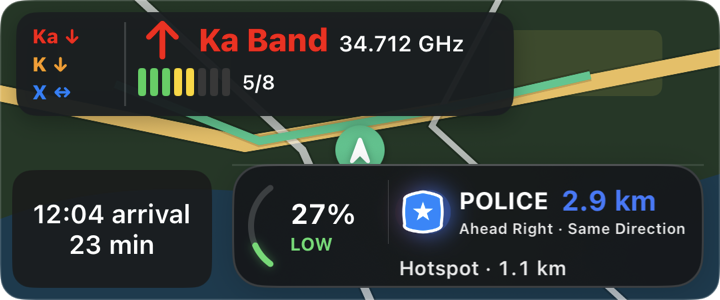
The gauge reads 77% High. Oak St is behind you at 503 m. Main St is ahead at 565 m. The detector separately shows Ka at 34.712 GHz from the front and a weaker K signal at 24.150 GHz from the rear.
Full-size simulator examples · two Ka frequencies · GPS lockout · Full Navigation with RDV.
Read the distance and street on each police card. In the detector area, each band name uses the color you chose in Banners & Visuals → Band Colors. The frequency and direction use the HUD text color, and the meter shows strength. A signal can appear even when nobody has reported police.
Up to two eligible signals have their own row and strength meter. Direction appears when available and allowed by your settings. Lit bars progress from green through yellow to red as strength rises. When available, each visible frequency stays at three decimal places in GHz. A single +2 counts two more eligible signals beyond those shown.
A visible K signal at a learned location can show GPS Lockout when your mute-reason settings allow it. When muted-alert dimming is on, the band name and meter can dim. The frequency and lockout reason stay at full text contrast. Use the CarPlay side buttons for mute and GPS lockouts. The radar readout and banners are display-only.
Start navigation and radar returns to the banner you selected, including Radar Direction View (RDV) or Expert. During Full Navigation the native ETA card can narrow the HUD. A crowded navigation rail can show just the nearest additional item, such as Hotspot · 1.1 km. While cruising, the meter can switch to a number such as 5/8. If two complete rows still won’t fit, Signature shows one full-frequency signal with an overflow count. If that won’t fit either, radar uses the selected banner.
With this option on, Signature prioritizes two eligible secondary reports when they fit. A long street name may shorten. Report count depends on the available reports, display width and height. An active laser alert retains its existing presentation.
Risk gauge. The percentage and label on the left of Signature show Live Risk for your current location. For example, 27% · Low can appear alongside a police report 2.9 km ahead. Critical on the gauge is a Live Risk level.
Forward rail. The rail runs from Now toward an 8 km horizon. A marker’s distance belongs to its report or location. Live police can remain the headline even when a historical hotspot is closer. On narrower displays the rail can simplify to make the next threat readable.
What can appear. Threat Horizon considers live police, active laser, enforcement hotspots, learned Ka locations and optional aircraft. Heat Ahead Sensitivity defaults to Moderate+. Ka Encounters Required and Ka Hotspot Retention Days govern learned locations. Enable aircraft under Alert Sources → Aircraft Awareness → Show in Threat Horizon.
Each style uses the same forward-threat selection. Classic is the default strip. Classic Plus adds report age and confirmations when available. Stealth Alert groups details compactly. Dukes Carbon uses a high-contrast instrument layout. Signature HUD combines the Risk gauge, threat headline and distance rail, with the optional detector readout above.
Only Above Set Speed hides the strip below your chosen minimum. The starting threshold is 40 km/h when you enable the option. Hide Threat Horizon When Empty lets the strip disappear when there is no eligible forward content or secondary police card to show. Both options start off.
When the HUD displays Risk, it takes the place of the floating badge. The badge can return when the HUD hides if Show risk badge is enabled. A hidden HUD also leaves radar in your selected banner. A quiet strip means Dukes has no qualifying report to show.
Threat Horizon Attention starts off. Choose a single flash, a flash followed by a pulse, or a pulse while active. Flash Primary Text is a separate option for a new selected threat. Police can alternate red and blue. Police and Laser are enabled as effect categories by default. Risk Hotspots and Ka History are opt-in.
Enable Adjust Vehicle Position to shift the vehicle marker during heading-up follow. Choose Always or Threat Horizon HUD Only under Apply Vehicle Position. With HUD Only, the adjustment applies while the strip is visible. The setting moves the vehicle marker and keeps alert controls in their usual locations.
Open App Settings → Diagnostics → Threat Horizon Diagnostics, enable local capture, reproduce the issue and use Mark Issue. Export the log for support. Include your HUD style, whether navigation was active, and which report or detector reading you expected. Capture is off by default and you choose whether to share the log.
Every detection session can be saved for later. Open the Encounters drawer tab.
Feed — Searchable list with band filters and labels.
Map — Sessions plotted on the map.
Insights — Patterns over time.
Open an encounter for the route, signal-strength timeline, first detection, Advanced Warning, adjustable Estimated Acquisition Threshold, notes, labels, detector/firmware, and for laser: gun name, mode, source, and timeline. Radar direction can show Front → Side → Rear on the map.
Sources include Uniden radar/laser (including Laser TP when installed), V1G2, ALP, and TMG. Jammer state and JTK changes are recorded when the hardware reports them.
Export native .dukesencounters, summary CSV, detailed per-sample CSV, telemetry CSV (includes laser gun and raw laser ID columns), and KML. Import and delete-all are in the overflow menu. Screenshot Mode is available on the detail screen. Non-laser encounters can use Explain Encounter.
There is no separate encounter auto-delete setting. Clearing is manual, or included in a full backup restore.
Named areas that change settings when you enter or leave. The drawer tab is Location Automations.
A Location Automation can change alert, laser, and radar preferences while you are inside an area you created, then restore the previous settings when you leave. Alert changes can include cameras, community alerts, voice and tones, GPS lockouts, and some navigation or privacy choices. Laser changes can include an ALP profile or TMG detection-only. Radar changes can include supported detector overrides and app Dynamic Muting.
If two areas overlap, the higher-priority one wins where the settings conflict. Show geofence borders under Map & Appearance can draw the outline. CarPlay can show a brief notice when you enter or leave. Bluetooth reconnect is separate.
Help answers do not list your areas, their names, or their locations, and they cannot edit them.
Create an area, draw a polygon on the map, then set Where, When, Actions, Priority, and review the Summary.
Actions are grouped: Alerts (cameras, community, voice/tones, GPS lockouts, some navigation and privacy), Laser (ALP device profile A/B/C, TMG detection-only), and Radar (Uniden overrides, V1G2 overrides, ALP band muting, app Dynamic Muting).
Boundary Behavior uses Entry Buffer, Exit Buffer, Entry Delay, Exit Delay, Minimum Stable Time, and Ignore Poor GPS Accuracy so the automation does not flicker at the edge of the zone.
Manage everything from Bluetooth → My Devices. Remembered devices auto-connect. Use the device detail screen for Connect, Disconnect, Forget, and per-device options.
Drawer›Bluetooth›My Devices
Directional radar detectors with GPS lockouts and profiles.
Omnidirectional Uniden models with K Blocks support.
ESP connection, arrows, and saved detector profiles.
Bluetooth radar with Uniden-style pairing. Omnidirectional.
Laser defense with JTK, profiles, and encounter logging.
Laser system with JTK, detection-only, and encounter logging.
Physical shortcut button for mute, lockout, JTK, or report.
Supported over Bluetooth: R4, R4w, R8, R8w, R9, R9w. R7 is not supported.
Direction: R8/R9 families are directional (front/side/rear). R4 is omnidirectional.
Default Settings captures or applies the Default profile. Custom Profile is a full editor (bands, city/highway, GPS, display, expert options) and can be toggled from the map bar.
K Blocks are Uniden-only frequency notches for BSM. DS1 does not show this tab.
Gatso and MRCD, GPS lockouts, hardware mute, and optional Uniden Laser Pack / Laser TP logging are available where the hardware supports them. App Tone Blocks are R4/R8/R9 only.
Pairs as V1connection (often not listed in iOS Settings → Bluetooth). ESP connection can show “Connected, waiting for V1 data.”
Modes: All Bogeys, Logic, Advanced Logic. Optional indicators on the phone map, CarPlay map, and Data Mode.
BSM+ needs firmware v4.1035+. Auto Volume needs compatible firmware and changes detector volume over ESP, not Dukes alert volume.
Custom Frequencies and Frequency Rules. Saved Detector Profiles do not store custom frequencies. Optional automatic City/Highway profiles by speed.
K Auto Mute, Logic Mute status, Gatso RT4, Photo Radar Intersection Management Filter, and related photo-radar options live in V1 Settings. V1 has no built-in GPS lockout memory and no K Blocks — phone GPS lockouts still apply.
Pairs on the Uniden/Radenso Bluetooth path. Uses the same settings surface as Uniden with important gaps: no K Blocks UI and no App Tone Blocks. Omnidirectional, 5-bar strength display.
AL Priority (ALP) and TMG are laser systems you can add from the Settings drawer under Bluetooth → Add Device. Dukes can show that they are connected and can speak laser alerts. ALP has no speaker, so Dukes app tones carry ALP radar audio.
Laser Defense Alerts, under App Settings → Sound & Voice, controls Dukes spoken laser alerts for these systems and for a detector’s laser alerts. It does not set the hardware volume and does not change the laser system’s operating mode. Ask Dukes does not send hardware commands.
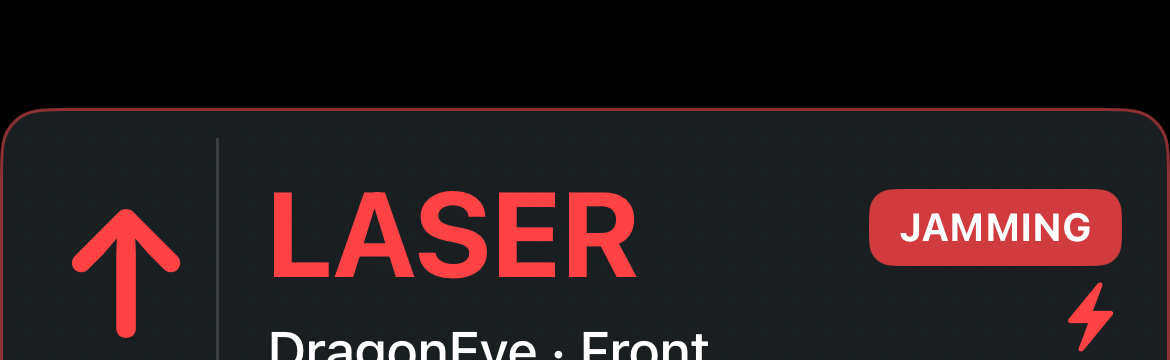
Jammer is actively jamming. Banner can show gun type and sensor (front/rear). Parking / Detection / Defense come from the ALP pad or CarPlay JTK.
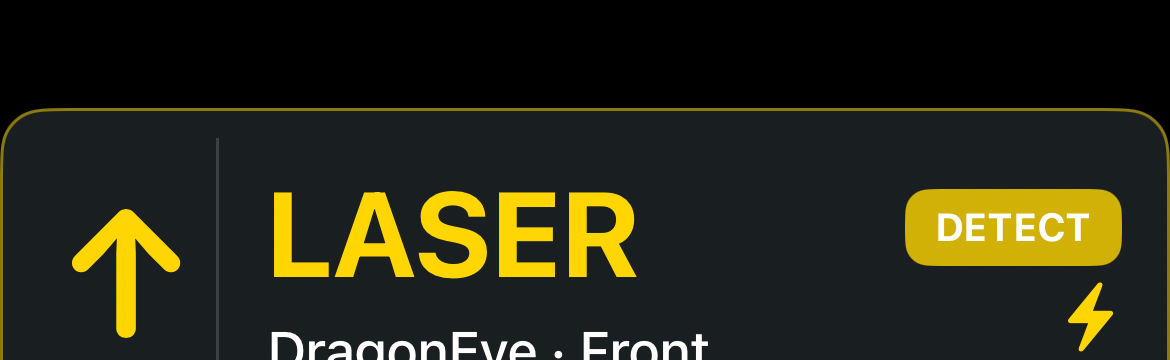
Receive-only: identifies laser without jamming. Useful where jamming is not permitted.
ALP: remembered device + PIN, auto-connect, Ignore ALP mute for radar, ALP radar antenna installed (Data Mode labeling), parking proximity display, voice packs, encounter logging, background reconnect. Device profiles A/B/C can be switched by Location Automations → Laser.
TMG: Auto/Front/Rear role, reconnect, banner duration and colors, PSL/JTK timing, detection-only, CarPlay JTK parity, and encounter logging. Pairing uses the code shown in the device footer.
Open App Settings → Devices & Connections → Add Device → Radar Detector → Escort. Keep the detector powered and nearby. Connection, authentication and usable alert data are separate stages: a connected label alone does not prove the data link is ready.
Escort Settings shows controls the connected detector actually reports. Capabilities vary by model and firmware; do not assume Uniden controls apply. The device settings Mute Detector command sends a mute action and can be unavailable during a native detector lockout. Dukes GPS lockouts silence app audio separately.
If connected without alert data, use Escort Diagnostics and record model, firmware and the time of the issue. This guide does not certify every model detected by a Bluetooth name matcher.
Flic 2 is a physical shortcut button. Add it from Bluetooth → Add Device, then map single press, double press, and hold to the actions shown on that screen.
Add Device → Flic 2 Button. Map Single Press, Double Press, and Hold to None, Mute Detector, Add GPS Lockout, JTK Jammer, or Report Police. Optional CarPlay speedometer connection status.
Sharing a settings screen does not mean every control works on every device. Hidden or disabled rows are normal.
| Family | Works with Dukes | Notes |
|---|---|---|
| Uniden R8 / R8w / R9 / R9w | Yes, Bluetooth | Directional arrows, K Blocks, App Tone Blocks, GPS lockouts, hardware mute, Gatso/MRCD where the detector supports them, Laser TP if the pack is installed. |
| Uniden R4 / R4w | Yes, Bluetooth | Omnidirectional (no direction arrows). K Blocks and App Tone Blocks. No multi-horn arrows. |
| Uniden R7 | No | Does not provide Bluetooth connectivity Dukes can use. |
| Radenso DS1 | Yes, Bluetooth | Uniden-style pairing. No K Blocks UI, no App Tone Blocks. Omnidirectional. |
| Valentine One Gen2 | Yes, ESP / V1connection | Arrows, profiles, Auto Volume (compatible firmware), V1 Mode Display, Gatso RT4 / photo-radar options. No detector K Blocks. Phone GPS lockouts still apply. Temporary Mute supported. |
| AL Priority | Yes | PIN pairing, JTK, parking sensors, profiles A/B/C, encounters. Hardware mute of a radar detector is a detector feature, not ALP. |
| TMG | Yes | BLE pairing, Auto/Front/Rear, JTK, detection-only, encounters. Not a radar detector. |
| Flic 2 | Yes | Single / double / hold actions: mute, lockout, JTK, report police. |
| Escort | Integration available | Model/firmware capabilities vary. Pair through Escort and check readiness. |
When CarPlay connects, Dukes shows the live map, alerts, navigation, and speed on the car display.
Settings›CarPlay

Voice guidance and alert announcements play.

Police, radar, camera, and laser alerts play. Navigation voice is silenced.

All app audio silenced. Visual banners still appear.

Detector speaker is active. Tap to mute hardware audio. Also silences the current radar encounter in Dukes. Other alert families retain their own sound settings.

Manual radar mute is active. Tap to release manual mute; a GPS lockout or another mute reason may still apply.
First removes a stored lockout matching an eligible active signal; otherwise attempts to add one. GPS lockouts must be enabled and a location fix is required. Success shows “Lockout Added” or “Lockout Removed” for about three seconds. Icon color reflects custom-feed health, not whether this signal is locked out.
Some custom feeds are slow or stalled. Lockouts still use local data.
No custom feeds active.
Community feeds are not enabled.

Laser system idle / parking.

Receive-only.

Jammer is in defense when ALP or TMG is connected. Without a laser system, this button can toggle ETA vs full navigation when that option is enabled.

Opens the community report grid (police, traffic, crash, hazard, weather, closed). Order is customizable. Not a one-tap police ping.

Favorites, recents, and destination search.
The large police banner is the primary community police alert. Extra reports, dismissed alerts, cameras, and hazards use compact pills. Details for police filtering live in Police & Community.
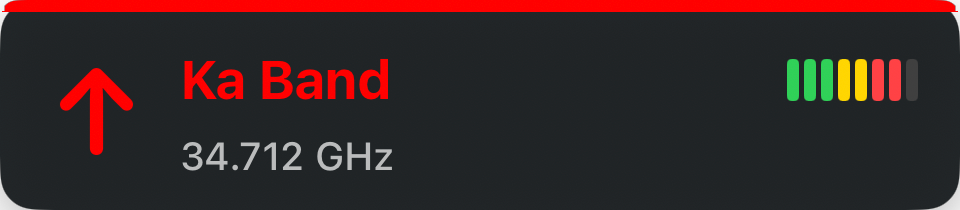
Ka Band — Band, frequency, strength, direction.
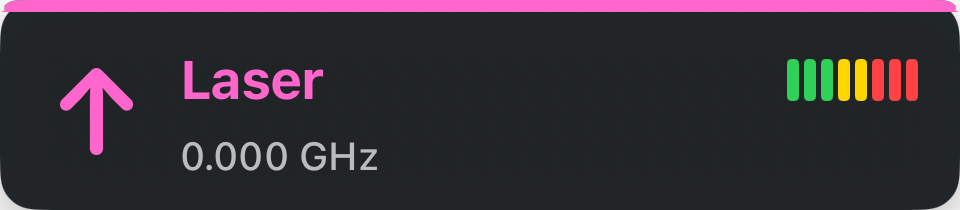
Laser — Police laser from the detector.
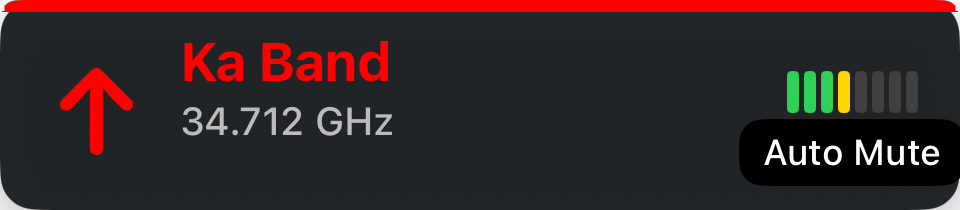
Muted / lockout / Temporary Mute — Signal still shown; audio may be silenced.
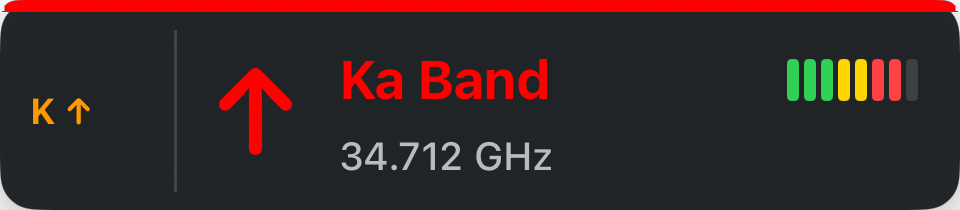
Multi-signal — Primary plus secondary bands.
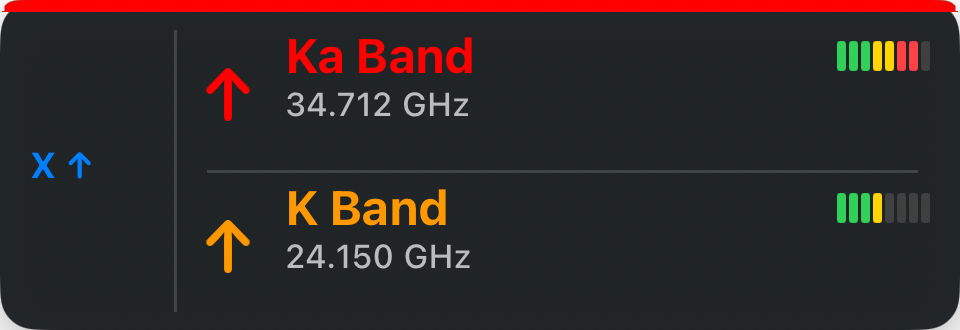
Expert — Full frequency and strength detail.
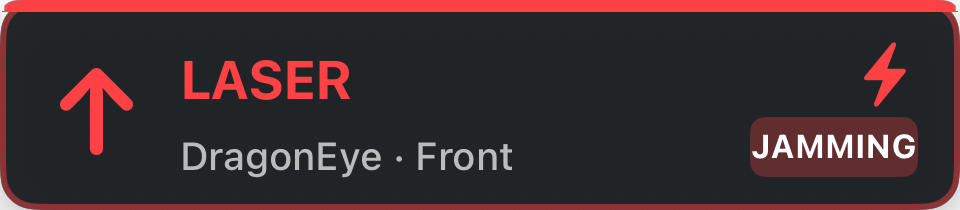
ALP / TMG jamming — Adjust speed, then JTK when ready.
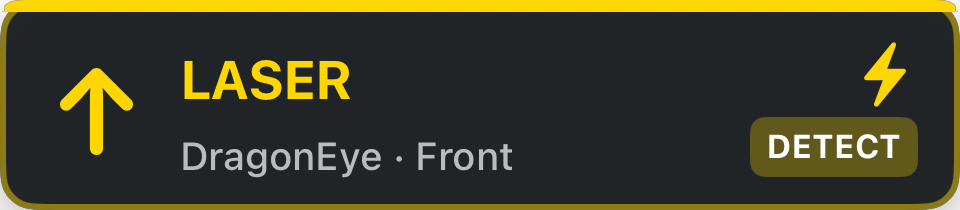
Detection-only laser — Identified, not jammed.
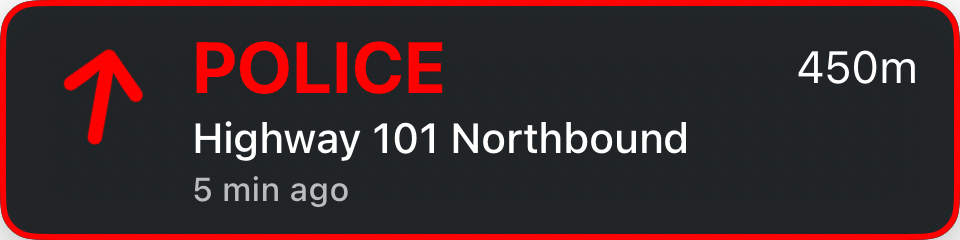
Police — Street and distance from your feeds, after Custom Feed filtering.
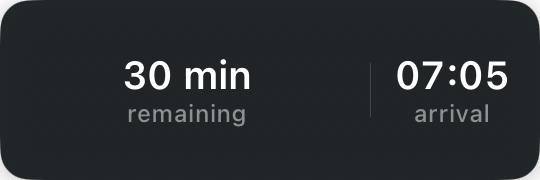
ETA — Remaining time, distance, arrival during navigation.
Compact chips on the CarPlay map for extra or dismissed alerts. Enable pill banners, report age, and voting under Police reports.
The primary police alert stays a full banner. Secondary police reports (up to three extra) become pills so the map is not stacked with banners. Still There can shrink a banner into a pill after you confirm it. Not There removes it.
Pills can show report age (for example “20 min ago”), a freshness star, and confirmation count / latest confirmation age when those Custom Feed options are on. Pill distance and filter settings are separate from the main banner distances.
Flash Nearby Police Pill pulses the pill border when you are close. CarPlay Police Proximity Glow is different — it highlights police map icons, not the pill.
Pill approach voice reminders are optional and off by default in Alert Sources → Police reports. Choose repeated distance milestones or a single early warning, then the available distance and audio options. These do not change the first primary police announcement and are separate from background police reminders.
Camera and hazard pills are compact approach chips. Muted radar stays visible as a muted banner or pill so you can still see the signal. Temporary Mute can show on muted radar status.
Short CarPlay toasts also appear for Location Automations (zone active, then default settings restored on exit), GPS lockout added or removed, report sent, Still There / Not There, and ALP/TMG mode changes.

Speed Camera ahead.

Red Light Camera ahead.

License Plate Reader ahead.

Hazard — community-reported.

Aircraft — callsign and distance when Aircraft Awareness is on.
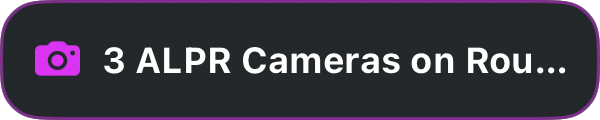
ALPR Route Status — plate readers on the active route (optional).

Location Automation toast — zone active, or default settings restored on exit.
Turn on Show risk badge for a floating Live Risk readout. Show nearby police adds a count within your chosen radius. For individual reports, use Show Secondary Police in Threat Horizon. The Signature gauge uses the same Live Risk percentage and level. Choose where police reports appear.
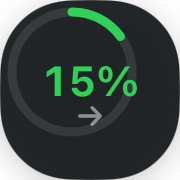
Low
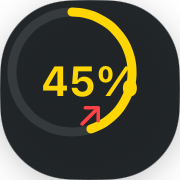
Moderate
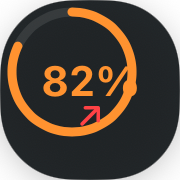
High
Choose Notification Destination: Both (default), Phone Only, CarPlay Only, or Advanced per alert family. Police, cameras, hazards, laser, and radar (with band toggles) can alert while the phone map is not the screen in front and CarPlay is connected.
A locked iPhone can still silence Dukes speech if you mute voice while the screen is off. That voice gate is separate from this destination. These alerts are not a promise that every phone notification will appear.
Radar re-alert delay and re-alert trigger are separate for unmuted and muted signals. Muted-reason labels can show GPS Lockout, Low Speed, Quiet Ride, Weak Signal, Manual Mute, Temporary Mute, and similar.
Live Background Alerts (Live Activity / widget) is off by default.
Data Mode is the glanceable phone dashboard used while CarPlay is connected. It is not the normal live map. CarPlay keeps the map. Disconnecting returns the phone map. The switch is under CarPlay → Phone Display and is on by default.
Tiles include Radar (priority signal), Alert (police reports), Speed + limit, Threat / risk, and Camera when approaching cameras. Optional Follow app theme and Small/Big element size. V1 mode can appear here if that indicator is enabled. Follow app theme only changes the dashboard look. It does not change the route.
3D Navigation Map is the saved CarPlay preference. It is off by default. While it is the mode on screen, CarPlay uses a 3D follow view. During navigation, compatible 3D follow uses a reduced pitch the head unit accepts.
Highway 2D can switch that view back to classic 2D framing above a speed while 3D is still the saved preference. North up during navigation can also select classic framing. Turning Highway 2D off does not by itself delete the saved 3D preference. Upcoming Street Labels use 2D or 3D size based on the mode actually showing, not only the saved preference.
The phone map has its own North up control. CarPlay 3D does not change phone map style, traffic coloring, or the route.
CarPlay Report Order changes the order of the report-grid buttons. It does not send a report by itself, and it does not change which reports exist. The vehicle decides how many buttons fit and the final grid layout. Open it under App Settings → CarPlay.
Experimental. Night Hybrid is off by default and is not a standard map mode. It is CarPlay only. It follows CarPlay night appearance and only affects Hybrid map imagery, which it darkens and mildly desaturates. It does not change the phone map, alerts, or routing.
Intensity darkens that treatment. Tone shifts it from neutral charcoal toward cool navy and does not control how dark it is. Both sliders are tuning controls. Hybrid in Map Style is a different choice: it selects hybrid imagery. Night Hybrid is an extra night treatment on top of that imagery, under CarPlay → Experimental / Testing.
Voice routing is under App Settings → Sound & Voice. It also affects navigation speech. Dukes-generated tones are under App Settings → Sound & Voice → App tones.
| Mode | What it does |
|---|---|
| Duck Music | Default. Lowers other audio during speech, then restores it. |
| Stop Music | Pauses music until the announcement finishes. |
| Mix (CarPlay) | Mixes with car audio. Intended for CarPlay. |
| iPhone Speaker | Forces speech to the iPhone speaker. |
| Media Audio | Uses media-style playback. Try this if music reaches the head unit but voice alerts do not. |
Test Voice speaks “Police reported ahead.” using the same path as live alerts.
New-install defaults for this guide’s source version: Ka, K, X, GATSO and MRCD radar voice alerts are off. The individual speed-camera, red-light-camera and license-plate-reader voice toggles are on, subject to their category, Voice Alerts and other audio/relevance gates. Dukes radar-tone volume starts at 70%; Enable Alert Tones is on, ALP Radar is on, and Radar Detector Tones is off. Saved settings and older releases can differ.
Navigation and laser: navigation has its own voice setting. Laser Defense Alerts controls Dukes laser speech for both laser-defense systems and detector laser alerts; it does not set hardware speaker volume or change a laser system’s operating mode.
Detector hardware speakers are separate from Dukes tones. The CarPlay manual mute button also stops current radar tones and radar voice in Dukes; it does not silence unrelated alert families. Temporary Mute and GPS lockouts can optionally also mute hardware.
CarPlay speech compatibility: Standard, Enhanced, Maximum. Mute options include screen off, police-only when screen off, volume zero, no detector, no ALP, not moving (with idle delay), and mute after CarPlay/Bluetooth disconnect.
Priority Order under App Settings → Sound & Voice orders Dukes spoken alert categories. The speech queue uses the saved order for announcements, including police and laser alerts. Reorder categories in that editor. This is separate from Radar Priority, which chooses the leading radar signal for presentation and app radar-tone selection. Neither changes detector speaker settings.
Voice routing is under App Settings → Sound & Voice. It controls what happens to other audio while Dukes speaks, including navigation speech. It does not guarantee which speaker a car will use.
Duck Music is the default. It lowers other audio during speech, then restores it. Stop Music pauses music until the announcement finishes. Mix is intended for CarPlay and mixes speech with car audio; it does not promise a particular head-unit mix. iPhone Speaker sends speech to the iPhone speaker. Media Audio uses media-style playback. Try Media Audio or Mix if music reaches the car but voice alerts do not. Test Voice speaks “Police reported ahead.” and uses the same path as live alerts.
Dukes can intentionally suppress its own speech. These gates are under Sound & Voice and are off unless you turn them on. They are not a broken speaker, a GPS lockout, or Temporary Mute.
Speech can be silenced when the screen is off, or only police speech can be silenced when the screen is off. Other gates: volume at zero, no detector connected, no ALP connected, not moving after an idle delay (default 10 minutes, range 2–30), and mute after CarPlay or Bluetooth disconnects. A locked phone uses the screen-off gate. CarPlay can still be connected while that gate silences Dukes speech.
Posted limits come from downloaded regional packs first, then OpenStreetMap if needed. Accuracy varies. Correct a wrong limit with the map pencil.
Show speed limit is on by default. Position: Report Button, Separate Circle, or Highway Sign.
Current Road is the recommended display mode. Predictive can show an upcoming lower limit early (Closer / Standard / Earlier / Earliest / Custom). It can differ from the sign you are next to. Optional TMG Auto/RCV use of predictive limits is off by default.
Improved Speed Limit Matching is off by default under Enhanced Speed Limits. It can improve transitions on divided roads, intersections, and nearby parallel roads. It does not guarantee a perfect match.
Reduced Memory Speed Packs is off by default and does not require re-downloading.
Packs cover many US, Canadian, and other regions. Manage them under Data & Downloads. Clearing the speed-limit cache removes cached OpenStreetMap lookups and loaded road state; installed pack files remain. Remove a downloaded pack separately in Data & Downloads.
Predictive speed limits can show an upcoming lower limit before you reach it. The timing is Closer, Standard, Earlier, Earliest, or Custom. The number can differ from the sign beside the vehicle. It is an early display, not proof of the posted limit.
Current Road is the recommended mode when you want the limit for the road you are on. Predictive is optional. Using it for TMG Auto or RCV is off by default. A wrong prediction is a reason to switch back to Current Road or correct the limit with the map pencil. It is not a speed corridor and not PSL muting.
Off by default under Alert Sources → Aircraft Awareness. Uses public ADS-B positions for awareness only. Patterns such as low/slow circling can look like enforcement — they are not a legal classification.
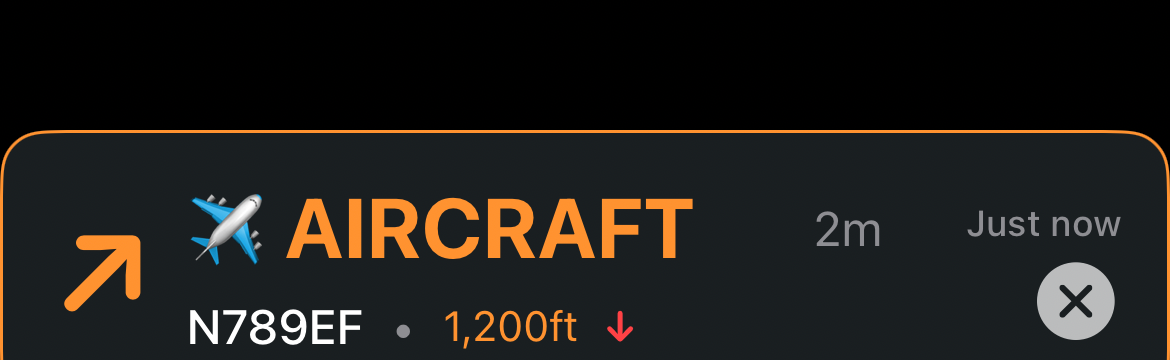
Low altitude, loitering, or matching a watchlist/filter profile. Treat as awareness, not certainty.
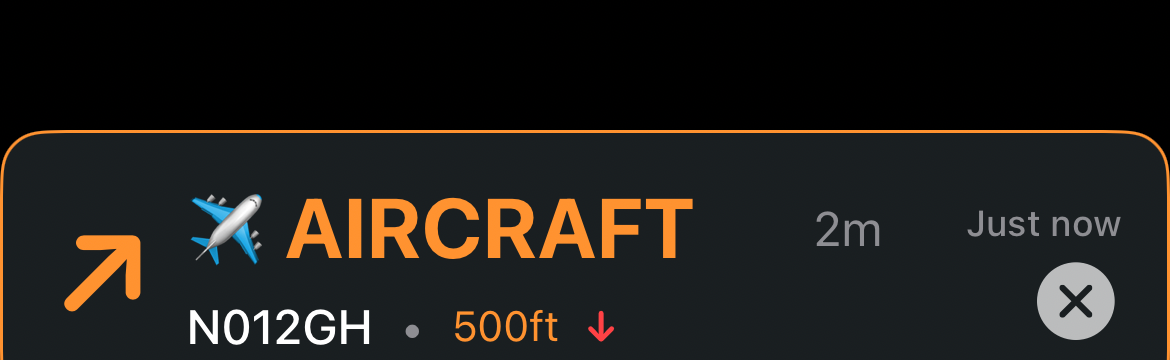
Higher-confidence match against your filters (very low, slow, circling, or a listed identity). Still not a guarantee of enforcement.
Presets: Quiet, Balanced (default), All Aircraft. Watchlist and ignore list. Optional watchlist-only alerts. Phone and CarPlay identity can be Compact or Detailed. Data providers: adsb.lol, adsb.fi, FlightRadar24 (at least one required). Enhanced local identification download is experimental.
Choose visual performance separately from when Dukes pauses background work.
Performance: Balanced (default), Best Quality, or Battery Saver. Balanced eases map work when full detail is unnecessary; Best Quality favors smoothness; Battery Saver lowers visual workload. Detector processing, alert audio, muting and lockouts remain active. Very high heat still triggers protection.
Advanced Battery & Heat contains Heat management, Preserve CarPlay display, Reduced rendering load and Reduced location load. The reduced-load options default off and are experimental. Best quality while charging is available only when the feature is enabled; it applies while charging and cool.
The Standby picker has one active choice:
| Choice | What it does |
|---|---|
| Off | Dukes stays awake. |
| Radar detector | Standby about five minutes after detector disconnect. Foreground and CarPlay lifecycle can resume/rearm work. |
| ALP or TMG | Standby after both laser systems have been disconnected for five minutes. |
| CarPlay | Standby after five minutes without CarPlay; wired and wireless use the same rule. |
| Standalone | Detector scanning stays off. Standby five minutes after unplugging unless Allow unplugged operation is enabled. |
| Unplugged | Pauses GPS, Bluetooth and feeds when unplugged; resumes with power or CarPlay. |
Standby can pause GPS, feeds, motion and camera work. It is different from Battery Saver's visual changes. Check Active / Waiting / Standby status before investigating missing background alerts.
Standby is one choice under Driving & Standby: Off, Radar detector, ALP or TMG, CarPlay, Standalone, or Unplugged. Off stays awake. Radar detector waits about five minutes after the detector disconnects. ALP or TMG waits until both laser systems have been disconnected for five minutes. CarPlay waits five minutes without CarPlay, wired or wireless. Standalone keeps detector scanning off and can standby five minutes after unplugging unless Allow unplugged operation is on. Unplugged pauses GPS, Bluetooth, and background updates until power or CarPlay returns.
Performance is separate: Balanced (default), Best Quality, or Battery Saver. Battery Saver is the choice that turns on Power Saver. Power Saver lowers visual map workload and forces the standard map. Detector processing, alert audio, muting, and lockouts stay active. Reduced rendering load and reduced location load are experimental, off by default, and are extra visual or location savings. They are not Standby. Very high heat can still trigger protection. If alerts seem to stop in the background, check whether status says Standby before changing audio settings.
Enhanced speed limits, Threat Horizon Road Map (regional Road Graph), CSA overlays, and CSA risk score data. These are separate downloads with different purposes. OpenStreetMap attribution is listed here. Prefer Wi-Fi for large packs.
Export a .dukesbackup file under Backup, Help & About. Includes app settings, GPS lockouts, Location Automations, custom feeds, cameras, navigation favorites, detector profiles, speed-limit overrides, and encounters. Import replaces current data on that device.
Navigate with Dukes share extension. Siri shortcuts. Privacy policy explains local storage and optional online services. Support: [email protected].
| Permission or connection | Purpose |
|---|---|
| Location and accuracy | Position, navigation, matching and lockouts. Review Dukes permissions in iOS Settings when background tracking differs from foreground use; approximate or unavailable fixes limit location-based features. |
| Bluetooth | Detector, ALP, TMG and button connections. Standalone intentionally stops detector scanning. |
| Notifications / Live Activities | Allow the feature in both iOS and Dukes when using background notifications or supported live displays. An on-map toast is a separate in-app confirmation. |
| Internet | Feeds, reports, online map/search/navigation services, aircraft providers and new downloads need their respective services. Downloaded road data, local settings and saved lockouts are separate; offline road data does not make every feature offline. |
No police alerts: add feeds under Custom Feeds, then check Alert Sources → Police reports. Check the selected matching source and its regional pack. On Route uses the active route; without navigation it uses its documented strict fallback, rather than switching to Balanced. See source requirements.
Voice but no music ducking, or the reverse: try Media Audio or Mix (CarPlay). Test Voice confirms the speech path.
Detector connected, no banners: confirm Hide detector-specific controls is off, and that a standby mode is not waiting for the detector.
Lockouts not learning: Enable GPS Lockouts, leave and re-enter the site, and check Highway Guard if you are at highway speed.
CarPlay overlays too large or small: set Layout to Horizontal or Vertical to match the screen, then reconnect CarPlay. Map overlay size can scale 100–150%.
CarPlay camera icons are map pins, not the voice alert. Three visual toggles default off and are separate from phone camera alerts and from voice: Speed and red light camera icons, License plate reader (LPR) icons, and Suspected LPR icons. Hiding an icon does not by itself decide whether a voice alert can play. Open App Settings → Alert Sources → Camera Alerts → Banner & CarPlay.
ALPR route avoidance does not enable map icons. Speed Packs, CSA overlays and Road Graph are not the static-camera database. Do not reinstall unrelated packs as a first step.
The lockout button is add/remove. Enable GPS Lockouts and have a usable location plus an eligible active radar signal. If a stored lockout matches, pressing removes it; otherwise it attempts an addition. The successful action shows a three-second on-screen toast. Pressing with no eligible signal is not a successful add, and the shield's feed-health color is not the lockout status.
Manual radar mute is a different button and does not create a saved location. Temporary Mute is timed per-signal suppression, not a GPS lockout.
Record app version/build, detector model/firmware, phone/head-unit details, approximate time, symptom and selected source/mode. In App Settings → Diagnostics, select Device Connection, Speed Limit, Battery & Heat, Threat Horizon or Strict Road Matching as appropriate. Escort also has its device diagnostics. Reproduce, mark the issue when supported, export the available log, then disable or clear capture when finished.
Diagnostics stay local until you export/share them and can include driving and location history. Review the contents before choosing a support destination. A backup is a restore file, not a substitute for a focused log. Support: [email protected].
Settings and feature controls are listed on the Settings Reference page, grouped like App Settings and the drawer. Search on this site uses the same list.
Start at App Settings in the app. Detector hardware still uses the Bluetooth, Default Settings, Muting, K Blocks, and Location Automations drawer tabs.